
September for me has always been ‘reset month’, far more than December or January. Something about getting into the last quarter of the year and panicking about how fast it all went (seriously, it was January like 2 seconds ago!).
It’s probably also related to the fact that for so many years of your life it was also the beginning of a new school year – new routine, new subjects, starting things fresh and full of hope, new stationary supplies ^_^
So I do a lot of resets in September, which means also reviewing my routines, adding and subtracting. My beauty routines are typically very stripped down to begin with, so there are not many products to speak of (and mostly I make my own stuff). But there is something about summer that, no matter how careful you are, you tend to come out of it needing some level of TLC or ‘corrective’. This hair reset routine is one.
I thought this might be helpful for more people, specially if you’re ‘low-‘ or ‘no-poo’, or if you’re trying to get back to basics with your hair care routine.
I’ll go into what I mean by ‘hair reset” first (and whether or not you might need one) – so that we’re all on the same page about what we’re doing – and then get into the actual step-by-step.
What’s a hair reset (or detox)?
A hair reset is basically a hair and scalp detox. You do a deep cleaning to remove all product buildup and exfoliate the scalp thoroughly. That gives you a clean slate to, hopefully, start fresh with healthier habits and routines.
A true hair reset will also involve soothing and nourishing steps after the cleansing, meant to actively correct imbalances and restore moisture.
This means a proper hair detox should come in the form of a ‘routine’, i.e. a series of steps, and not just be a single product you apply and be done with it.
How do you know you need a hair detox?
We all have different hair care routines – some more complicated than others, some using ‘healthier’ products and tools than others.
On the other hand, the hair and scalp can suffer under many different circumstances – the quality and toxicity of products you use, the pollution levels in your particular area, the hardness of the water you shower with, or even bad hygiene.
Even if you’re using a ‘good’ shampoo, you may not be removing it properly, so it builds up. Even if you’re ‘no poo’ and have no product to build up, you may still not be removing and redistributing the excess natural oils correctly and frequently. Or you may not be making the necessary adjustments for any lifestyle changes (like an increase in physical activity or moving to a new area).
Related content: How To Make Water Only Washing Work For You
So, the best way to know when you need a hair reset is to take a good look at your hair and scalp.
- If your scalp is excessively oil, itchy, or has a layer of gunk you can easily peel off when you scratch your head…
… you need a hair detox.
- If your hair is dull, limp or flat…
… you MAY need a detox.
Here, it’s also possible that you just need a bit of extra TLC (like a nourishing hair treatment) and/or a better diet.
So it’s not necessarily a need for the deep cleaning that comes with a typical hair reset – to address accumulated gunk – it might just be that you’re lacking proper nutrients to feed your hair follicles and the result is that lifeless thing languishing on top of your head.
So…
CAVEAT
Regardless of whether or not you decide you NEED a hair detox, carefully review your current diet to make sure you’re including enough of the things your body needs to build quality hair and skin. In general:
- Colorful veggies and fruit. Full-range minerals, vitamins, antioxidants and other phytonutrients.
- Sufficient amount of protein. The building blocks of skin, hair and nails.
- Fat. For healthy hormone regulation.
- As much as possible, home-cooked and whole-foods based. The more processed and the more refined, the more junk.
- Organic and as clean as humanly possible (in your particular situation). Toxicity accumulates and progressively deteriorates the body’s ability to self-regulate correctly – on all levels.
Related content: Best Natural Hair Loss Treatments By Type
The benefits of a hair reset
So, considering that the above is taken care of, or sufficiently addressed, what are the benefits of a hair detox?
It boosts healthy hair growth. By removing the layer of product buildup, environmental pollutants and hard water residue, it allows the scalp to breathe properly and better regulate the microbiome and, therefore, the follicle life cycle. By encouraging circulation of the scalp, it makes sure the hair follicle is provided with more oxygen and nutrient delivery. This means thicker and stronger hair growth.
It soothes scalp irritation, redness and corrects unhealthy bacterial overgrowth. By removing unhealthy impurities, dead skin cells and excess oils, it also allows for a healthier environment. Again, the microbiome is better regulated and you can get rid of issues like dandruff, seborrhea and excess oiliness.
Enhances hair bounce, volume and shine. Removing the gunk from your scalp and hair shaft also means it will be easier to work with, restoring the natural shine, making it softer and less prone to breakage.
It boosts product absorption. Any scalp serum, hair mask or oil treatment will penetrate much more easily and, therefore, be much more effective. If you have a thickish layer of crap over your skin or hair, you’re just wasting product because it’s barely making contact with the thing it’s meant to be treating.
Heals scalp sensitivity and inflammation. Product buildup, oil buildup and/or an imbalanced scalp microbiome all lead to irritation, inflammation and sensitivity. By removing it and boosting the scalp’s natural pH balance you can get rid of the discomfort associated with the most common scalp conditions.
Basic DIY hair reset routine (‘no-poo’ friendly)
Pre-Cleanse Ritual
First of all, step 0 before you actually start any at home hair reset routine. If you can, get a good hair trim to eliminate split ends and obviously damaged hair.
No matter what any brand may try to sell you, you cannot ‘repair’ split ends or breakage – they’re not going to glue themselves together again. At best, these products coat your hair with some (usually) synthetic compound, so that the hair feels softer and less frizzy, so it gives you the illusion that your split ends are ‘healing’, but that’s all it is – an illusion. So keep that in mind.
The vast majority (if not all) of the beauty ‘quick-fix’ range of products only provide an illusion effect and don’t actually treat anything, and the sooner you start realizing that and acting on it, the better off you and your wallet will be. Especially in a case like this, where product buildup is one of the biggest issues and causes for the problem.
The hair just needs a good trim every now and then. Depending on your particular hair care routine, that might be more or less frequently, but just embrace it.
STEP 1 – BRUSHING
With that out of the way, the actual first step in this hair reset routine is a good brushing.
For this you want a proper brush and not a comb, since the purpose is not so much to detangle as it is to give the scalp a good massage and to start shifting loose dirt and product particles from the hair shaft.
Get a natural bristle brush – no plastic or synthetic fibers. The natural bristle brushes are a lot gentler on the hair shaft and the scalp, so they’re a lot less likely to cause hair breakage and or scalp scratches.
Hang your head upside down and brush from the back of your head to the front, all the way around. Do this for a few minutes.
STEP 2 – CLEANSING
scalp scrub
After a thorough brushing you’re ready for the deep scalp clean – the thing that’s going to really remove that dead layer of product buildup and dead skin cells that’s ‘gunking’ up your scalp.
Pretty much any kind of scalp scrub will do here – depends on your DIY comfort zone and how much you wanna fuss over the recipe. I wrote a previous post on scalp scrubs (it has a handful of simple recipes), you can check that out for ideas too.
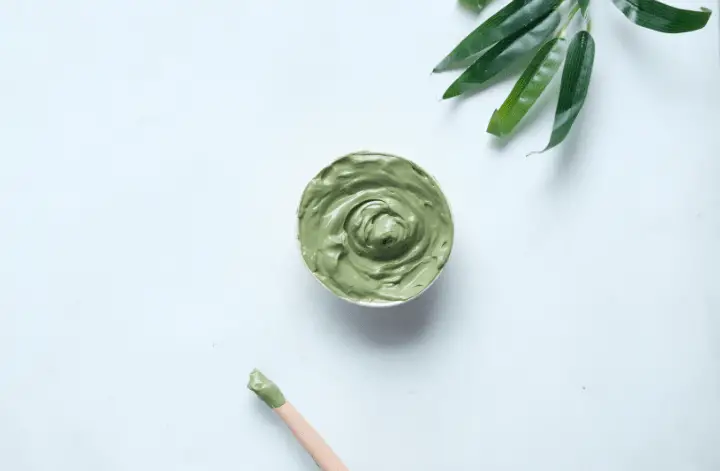
But my go-to scrub, both for simplicity and effectiveness (favorite combo!) is:
- 1 Tablespoon green clay (or Ghassoul / Rhassoul clay)
- 1 Teaspoon fine sea salt (you can also grind some coarse sea salt yourself)
- ½ Tablespoon vinegar (or glycolic acid toner)
- ½ Tablespoon water
This works both as a physical exfoliant (salt and clay particles) and a chemical one (vinegar and glycolic acid are AHAs). On top of that, adding salt to the clay enhances its ‘pulling’ properties (absorption and adsorption), so it’s even more detoxifying.
It’s better to do this in the shower, because it can get a bit messy. But you can also just tilt your head over the skink and put a towel over your shoulders, apply and do the massage for about 3-5 minutes. You can wash it off straight away, if you want, but I usually prefer to leave it another 5 or 10 minutes, so that the clay and vinegar mixture have more time to do its thing. When I leave it on I just wrap my head loosely in an old towel, so I don’t make a mess.
You can also customize your scalp scrub to include herbal powders, like cinnamon, clove or Shikakai (a popular Indian herb used in herbal shampoos). Or you can add a teaspoon of a liquid (or melted) oil like olive, castor, sesame, or coconut. Again, depends on your budget, patience with DIY and availability.
If you’re ‘no-poo’:
- Leave out the clay, because it can be tricky to remove fully with just water. And if you’re on a ‘no-poo’ routine it’s not likely you’ll have the same type of hardcore stuff to pull out of the scalp. Stick to the salt and vinegar gentle scrubbing action.
- Also, skip the oil additives – it’ll be harder to remove properly in the next step, since you’re not using the foam-based cleansers.
hair washing
An alkaline (basic) shampoo bar or plain-‘Jane’ soap.
For a deep cleaning of the scalp and hair shaft the best thing is a more alkaline ‘detergent’, because they’re more stripping.
Typical shampoos these days are more on the neutral and even slightly acidic pH range. This type of product is more suited for frequent washes, because it doesn’t strip the oils as much. And most of the population has got used to washing their hair several times a week.
If you add to that the fact that you may not be washing off the shampoo and/or conditioner residue completely, you can start to understand the mess when you get buildup from that and from all the other products you pile on top of it, that the shampoo may also not be removing completely.
To peel off all that ‘gunk’ you need a good, old-fashioned (read: alkaline) version. You can do that easily two ways:
- The ‘lazy’ way:
By adding a teaspoon of baking soda to your regular shampoo, giving a good scrub and washing off thoroughly. Baking soda has a similar pH to that of plain soap (approx. 9).
OR (my personal favorite):
- By using a basic soap bar (pH 9-10 approx.)
Here you can use a natural shampoo bar (even the commercial brand ones tend to be more alkaline). You can get (or make) a good homemade version (this of course requires a bit more DIY skill). Or you can use an Aleppo/Marseille type of soap bar. These are made from pure olive oil and curated for much longer than usual, resulting in a gentler (though still very cleansing) bar of soap.
Whichever one you choose, the important thing is that:
- You lather up the hair thoroughly and spend a few minutes just massaging the scalp with the balls of your fingers.
- Rinse off equally thoroughly, for a few minutes.
- Repeat the process a second time to make sure all traces of the scalp scrub is removed and your hair is squeaky clean.
no-poo alternative
- Just rinse very thoroughly with warm to hot water.
- You can also follow that with a mixture of a teaspoon of baking soda in 2 cups of warm-to-hot water, mix well and rinse your hair with it.
STEP 3 – REBALANCING & HEALING
Once the hair is properly clean and the scalp exfoliated you need to rebalance the pH and dissolve whatever mineral residue might be in the water you’re showering with. Hard water is absolute murder on the hair and skin!
The best thing here is a final rinse with vinegar water – and I mean ‘final’ rinse – don’t wash it off.
- The vinegar water mix will be slightly acidifying, helping to bring your scalp pH to its natural level (the so-called ‘acid mantle’, which is slightly acidic).
- It’s also antimicrobial, antibacterial, antifungal, anti-inflammatory, etc., etc. – which is to say, it will heal and soothe the scalp from just about everything.
You can use any kind of vinegar you have, as long as it’s food grade – cleaning vinegars are much stronger and, depending on the brand, might even be mixed with other agents.
From my personal experience, ACV (apple cider vinegar) and basic table vinegar are equally effective here, so don’t over complicate, just use the one you have on hand. Just one thing to keep in mind: red wine vinegar does darken the hair over time.
Basic vinegar water rinse
- 1 part vinegar
- 6-7 parts water
A couple of notes:
The ratio is not an exact science (I’ve been doing it so long I just eyeball it), but if you’ve never done it before go for the more diluted version. If your hair feels too dehydrated once dry, just add more vinegar next time. It sounds counterintuitive, but the more vinegar the ‘slicker’ the hair feels.
And, DON’T get it in your eyes…self-explanatory I think.
STEP 4 – NOURISHING
You may have noticed that there was no classic ‘conditioner’ step back there. That’s because all the typical conditioners really do is coat the hair shaft with synthetic agents, so that it feels soft to the touch and doesn’t tangle up. When you’re trying to simplify your hair care routine, especially in the case of a hair reset that you’re trying to get RID of product buildup, the ‘classic’ conditioner can (should) totally go.
Remember earlier when I told you the more vinegar you add to the vinegar water rinse, the slicker the hair feels? It actually acts as a natural conditioner, by sealing hair cuticles and helping to retain moisture in the hair shaft. The hair is automatically shinier and bouncier. You’ll especially notice a difference if you live in an area with hard water – it’s night and day!
Now, for the ends…
For the ends you might want to consider added protection. They’re the ‘oldest’ part of your hair, so they accumulate more damage and will start to look haggard sooner. Also, depending on your hair length, style and typical routine, it might get more of a beating.
The gentlest and most nourishing way to protect the ends and prevent them from splitting is to use a bit of hair-looving oil or fat.
My absolute favorites are jojoba oil and Shea butter, used separately, but you can also use other nourishing oils like grapeseed (light), argan (average), avocado (average), etc. Here is a nifty chart on carrier oils and their viscosity rates, so you can check about possible substitutions. Plus, another article with tips on how to choose the best substitutions (what to take into account).
Jojoba oil is the oil closest in structure to human sebum (natural body oils) and it’s very light, so it’s great for thin hair or hot weather. Shea butter is high in protective fats but still melts quickly with body heat, so it’s easy to apply. It’s great in winter weather or if your hair is coarser and/or curlier.
Depending on what my hair looks like and needs, I’ll use one or the other. For instance, in winter my hair (and skin) need more protection, so I tend to reach more for the Shea. In summer I’m sweating all the time and my hair definitely feels more weighted down, so I just hit it occasionally with some jojoba.
But it’ll also depend on your hair type and the particular climate fluctuation you have to live with.
Whatever one you choose, the method is the same:
- 3 or 4 drops of jojoba
OR
- Tiny pellet of Shea
Rub between your hands, flip your hair over and scrunch up your ends with your palms.
And you’re done!
How to prevent or minimize future buildup
A hair detox or hair reset is not something you should necessarily aim to do on a regular basis. I mean, it’s sort of implied in the name.
It’s something you can do if you’ve been accumulating a few bad habits, or you’re trying to change your routine to something more holistic and natural. Ideally, you’d construct a healthy hair care routine for yourself that would make sure you never (or hardly ever) need a reset or detox.
So, with that in mind, the best approach to prevent or minimize buildup (and make sure you don’t need hair resets) is to follow a ‘less is more’ approach, while boosting the body’s own natural processes.
I mean, the body doesn’t produce oils (just) to make your life miserable – it’s part of a self-regulatory system to maintain a healthy scalp microbiome that boosts a healthy hair growth and hair cycle, nourishing and coating the hair shaft. IF YOU LET IT!
The best regular habits you can adopt to prevent product buildup are:
To reduce the amount of products you use. Take proper stock of the stuff you’re using, both the quality and the perceived ‘need’. Maybe try a simpler hair routine – kind of elimination diet – to remind yourself of what your real hair looks and feels like. Then try to add one product at a time and reassess.
To use products with fewer ingredients (and with a more natural, high quality profile). When I say higher quality I don’t mean necessarily ‘bougie’ or expensive brands. A good rule of thumb is to look for products with SHORT ingredient lists and from more ‘natural’ or ‘organic’ backgrounds. Don’t automatically trust it’s good just because it says ‘natural’ or ‘organic’ – there’s a lot of grift in that space too. Do some research, get some second and third opinions. Or, if you’re OCD about it (like me) – make your own stuff 😉
To give your hair and scalp a good brushing every day (morning & night). This has many benefits: it boosts circulation in the scalp, feeding the hair follicles even more oxygen and nutrients, and it helps to distribute the natural oils down the hair shaft (natural coating and nourishing). It also helps to remove dirt particles that might have accumulated throughout the day. If you use a boar bristle type even more so, because they really ‘hug’ the hair shaft.
To adopt regular scalp balancing ingredients. The best (and simplest) thing for your hair and scalp is to end every hair washing session with a (leave-in) vinegar water rinse.
Regardless of the hair care routine you follow, it’s going to help balance and soothe the scalp, as well as help remove residues from the hair shaft.
Alternatively, you could also apply some glycolic acid toner to the scalp a few times a week. Either one you make yourself or a basic commercial preparation, like the one from The Ordinary. Glycolic acid is also slightly acidic (microbiome friendly), antimicrobial, antibacterial and a wonderful gentle exfoliant.
Related content: The Best of Natural & Minimalist Hair Care Routines
This at home hair reset routine is the perfect ‘pick-me-up’ after those perpetually sweaty, grimy summer months (or is that just me?). Fall reset mode is definitely on!